Multi-Warehouse User Guide
Contents
Introduction
Inventory management is a crucial part of electronic commerce. It is twice important when you have two or more warehouses/suppliers/drop shippers located worldwide / nationwide. That requires proper inventory management software.
Multi-Warehouse extension is a powerful tool in a warehouse management system that supports multi-warehouse functionality. It allows to set up multiple shipping origins within one installation, control stock in different physical locations through the same admin interface as well as many other functions for a shop.
Features
- Manage warehouses
- Split stock by warehouses for each product
- Import/export stocks per warehouse
- Allow customers to choose a warehouse per sales channel
Warehouses
To manage warehouses, tap Catalogues → Warehouses in the administrator menu.
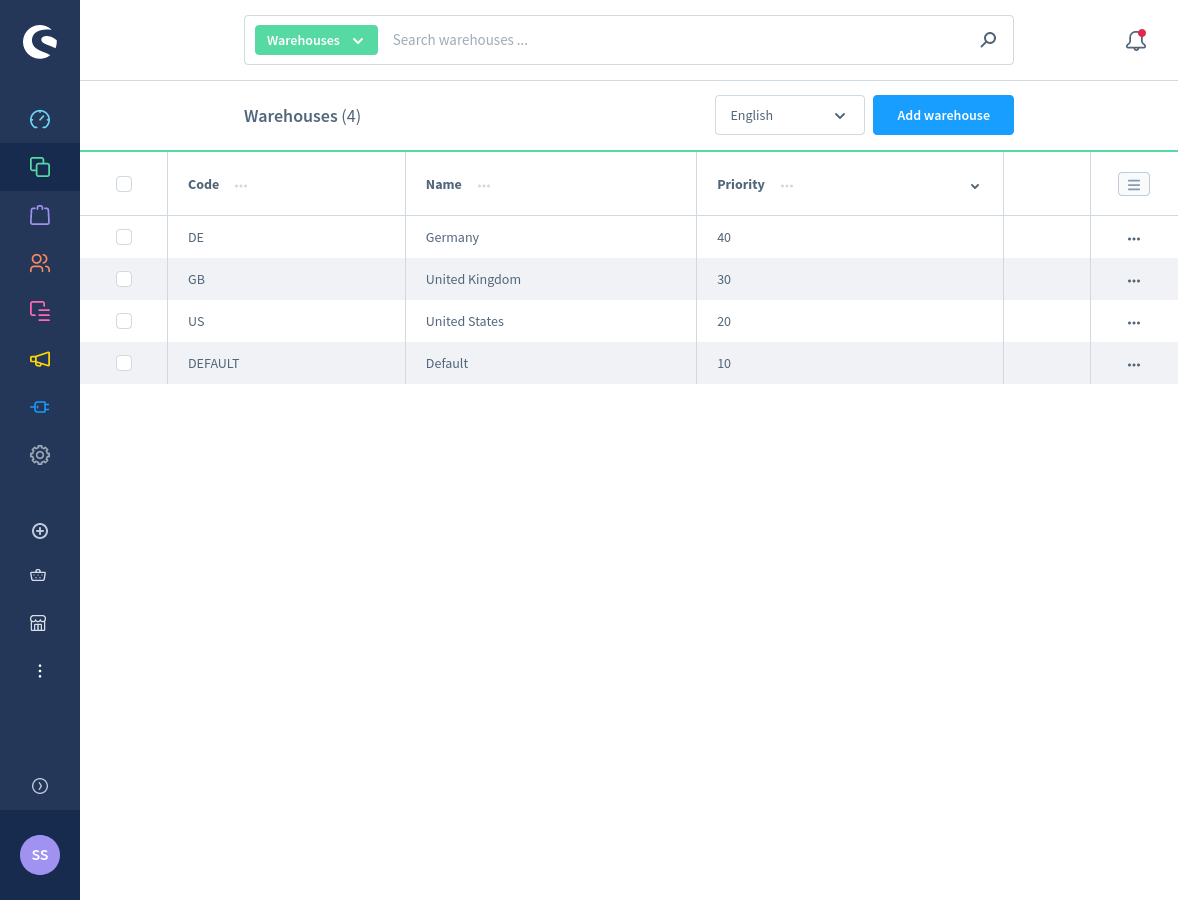
The system creates a Default warehouse automatically. It can't be removed.
To create a warehouse, click Add warehouse. Or click the Edit action link to edit a warehouse that was already created.
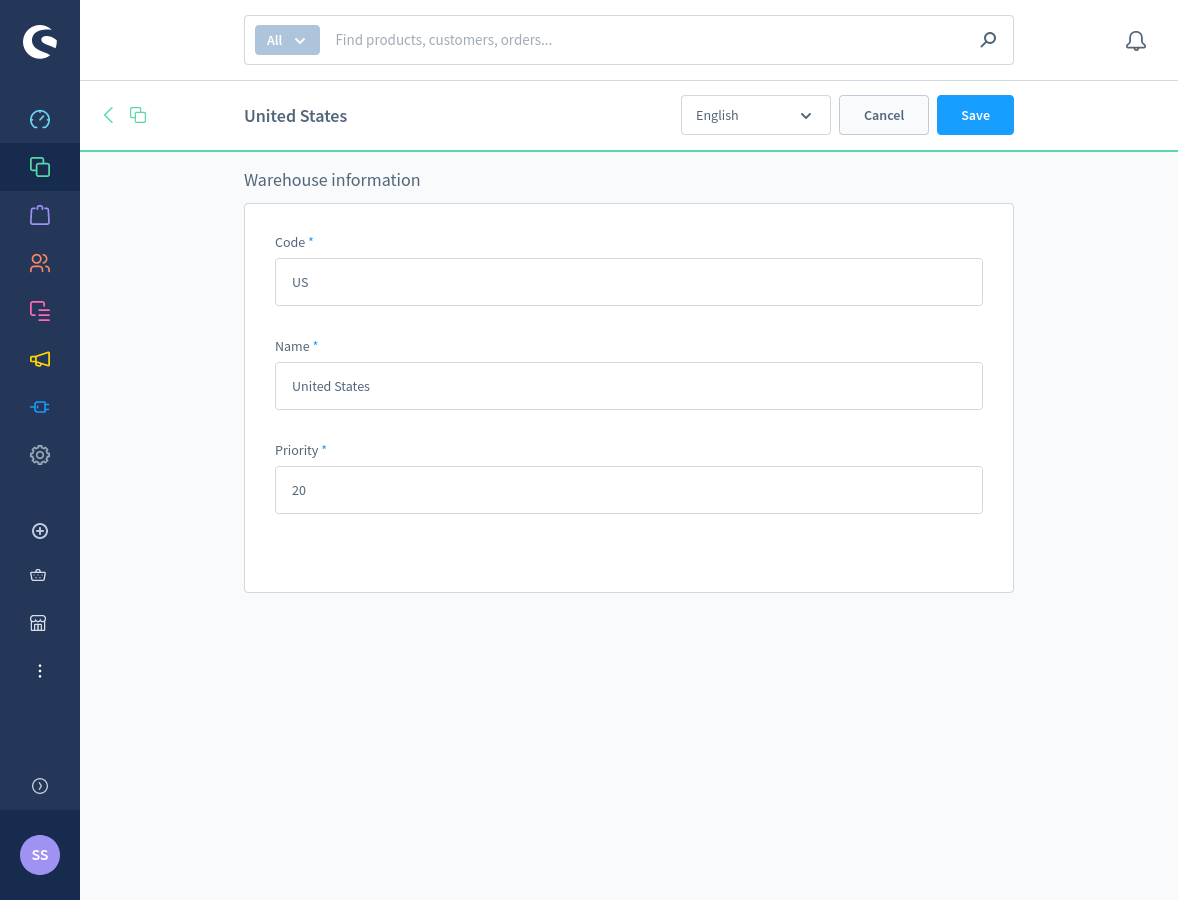
The list of warehouse fields:
- Code: a unique warehouse code.
- Name: a warehouse name. It can be set for each language.
- Priority: a warehouse sorting priority. Warehouses with the highest priorities are listed first.
Products
Select Catalogues → Products in the administrator menu.
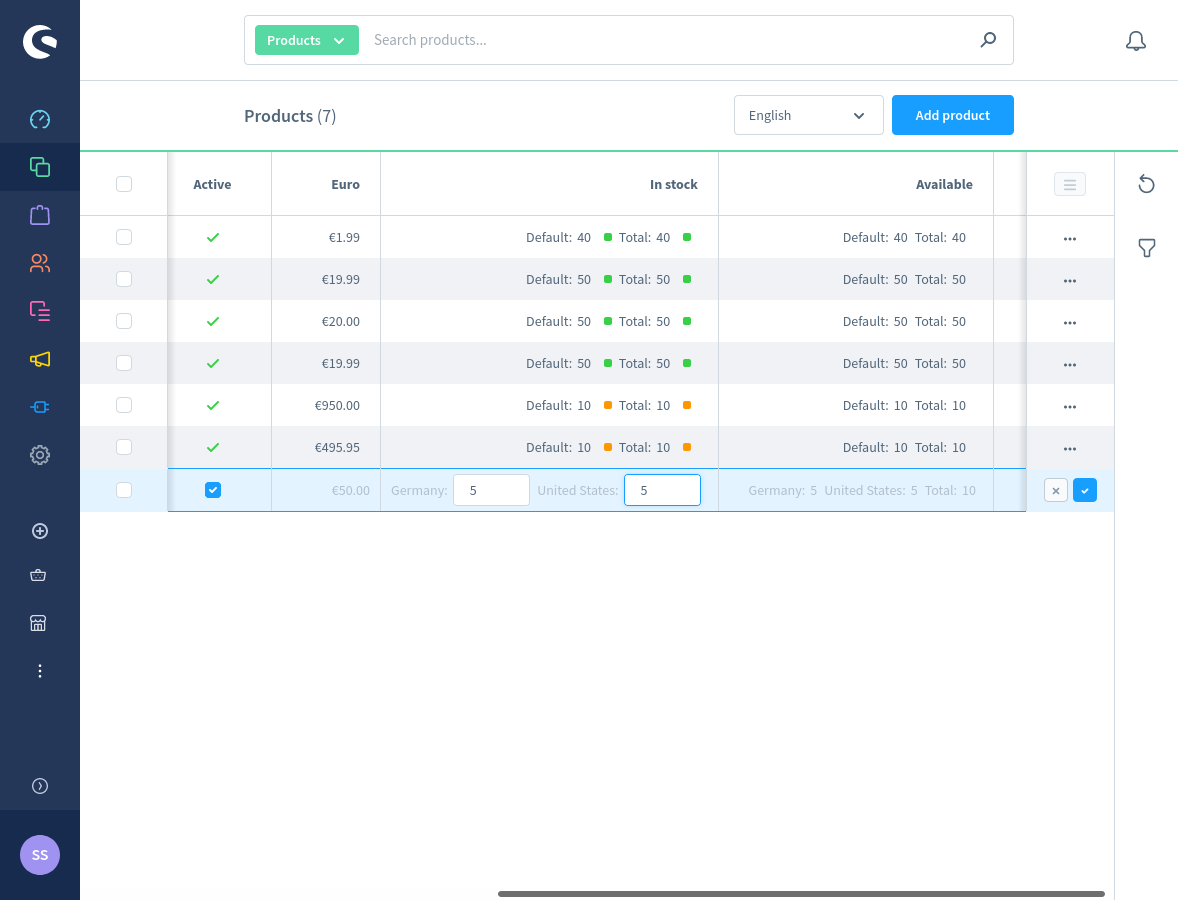
You can see that the module adjusts In stock, Available columns to display information for each warehouse.
Next, click Add product button to create a new product. Or click Edit action link to edit any of the previously created products..
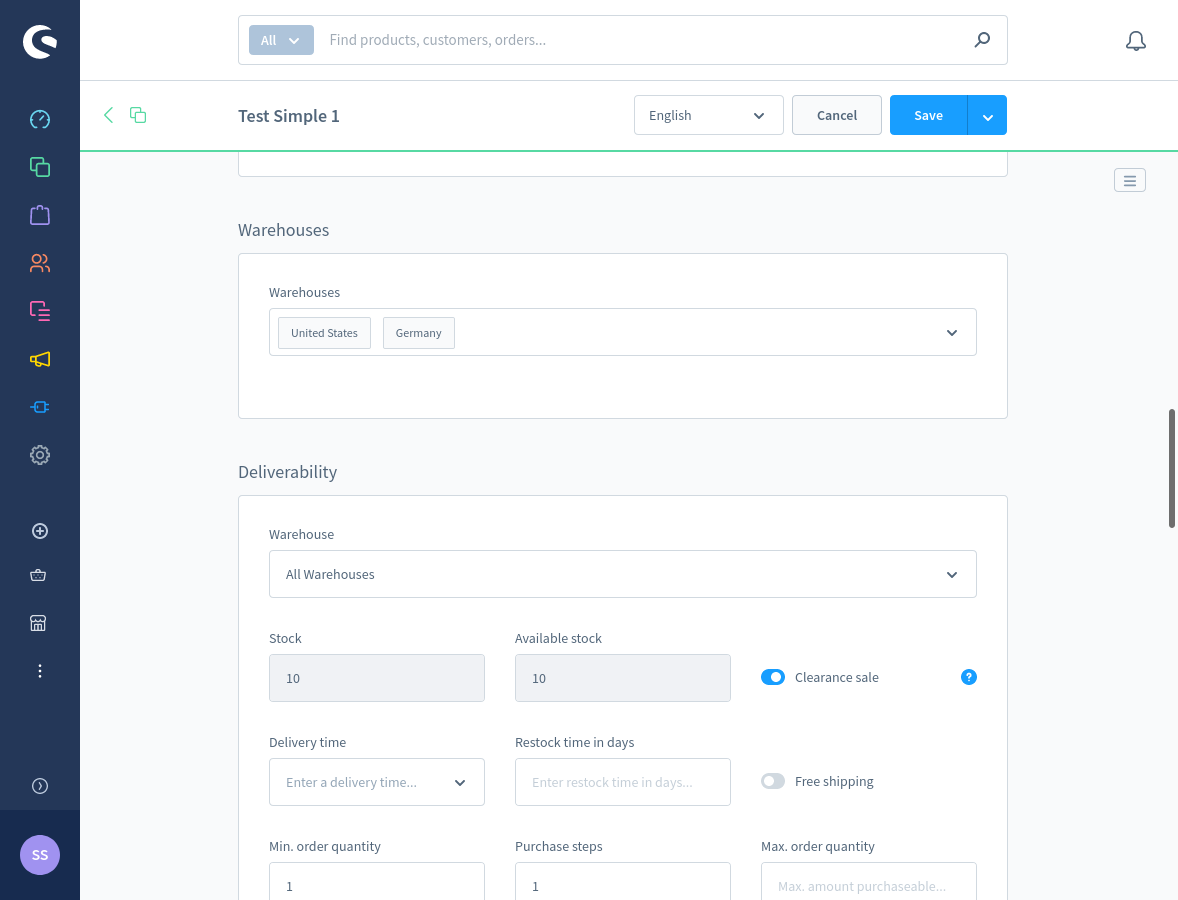
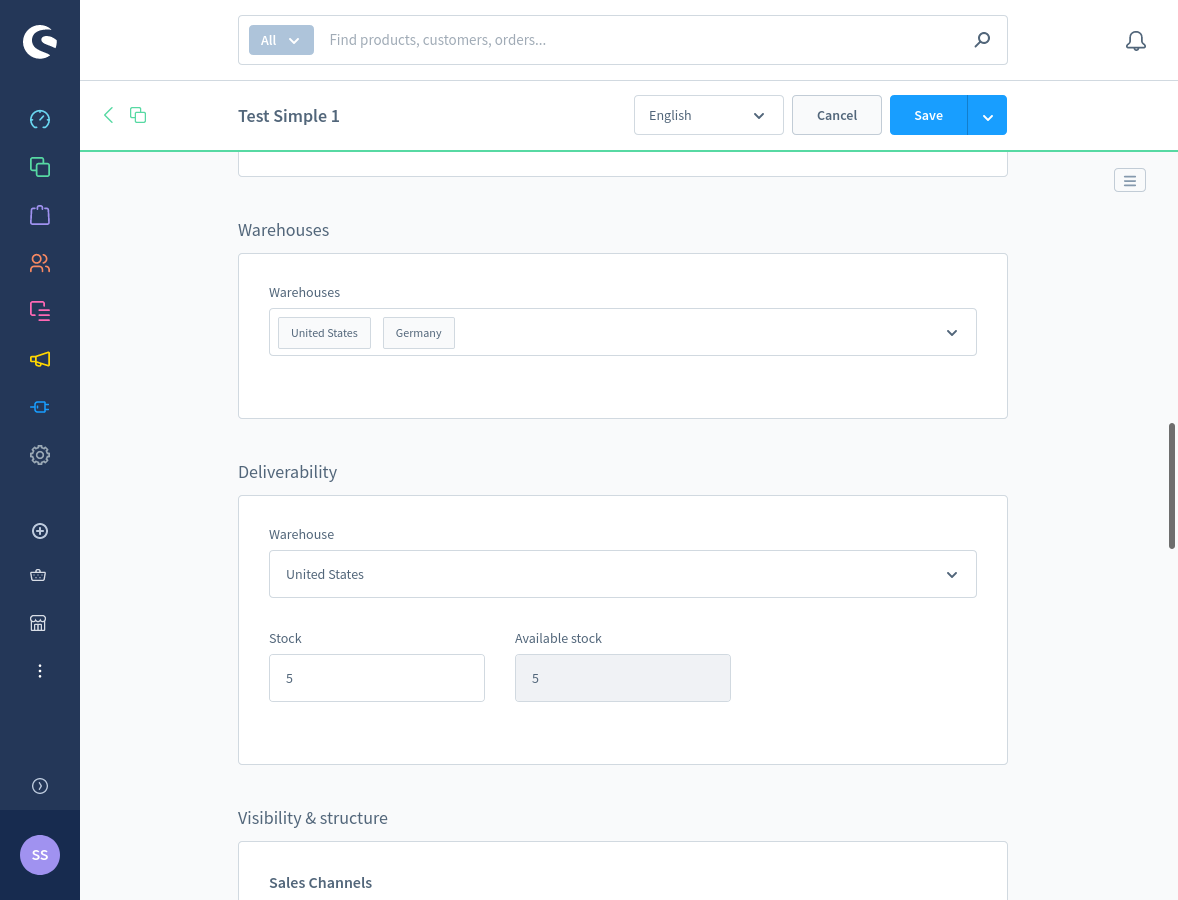
Select Warehouses for a product. Once done, you can enter the Stock field value for each warehouse.
Import/Export Products
Select Settings → Shop → Import/Export → Profiles in the administrator menu.
You can create new or edit existing product profiles here.
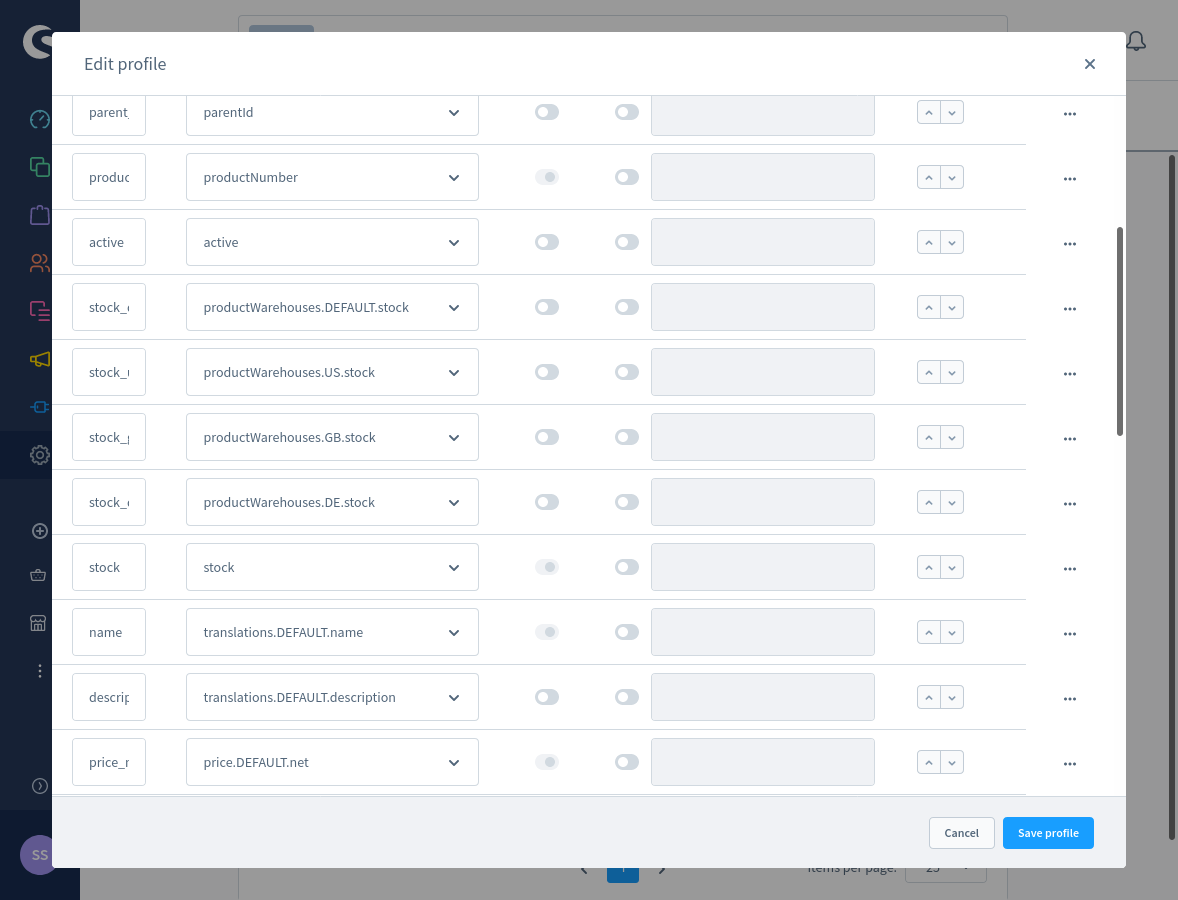
The module extends standard mappings to import/export warehouse-specific fields for products. A database entry path starts with productWarehouses. Next, a warehouse code follows. The third part is a warehouse-specific field itself (e.g. stock).
Orders
Tap Orders → Overview in the administrator menu.
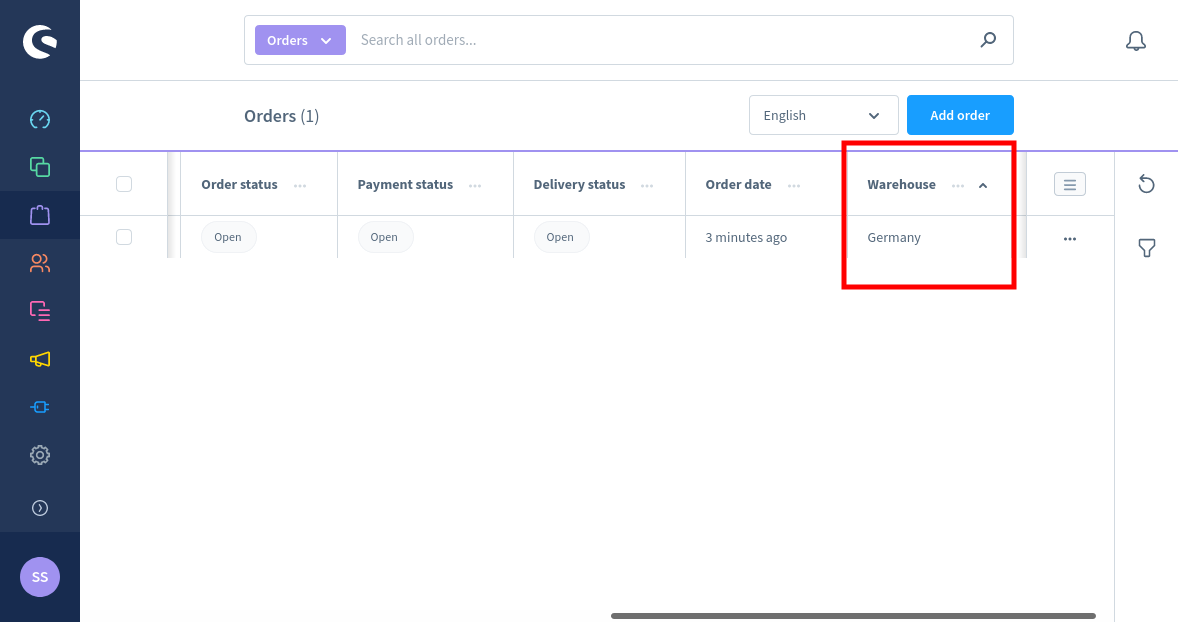
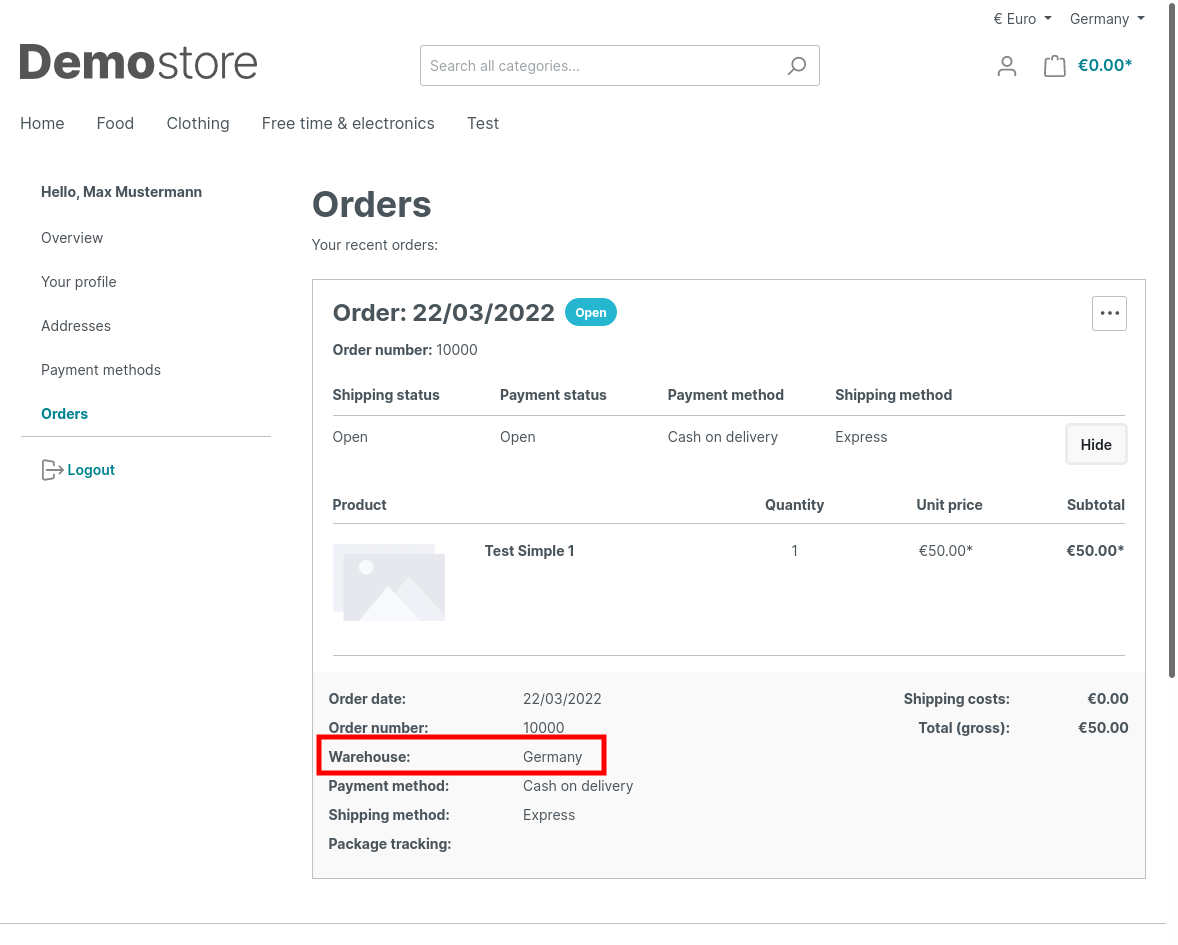
Each order has a warehouse assigned (see Warehouse column).
Create a new order by clicking Add order button.
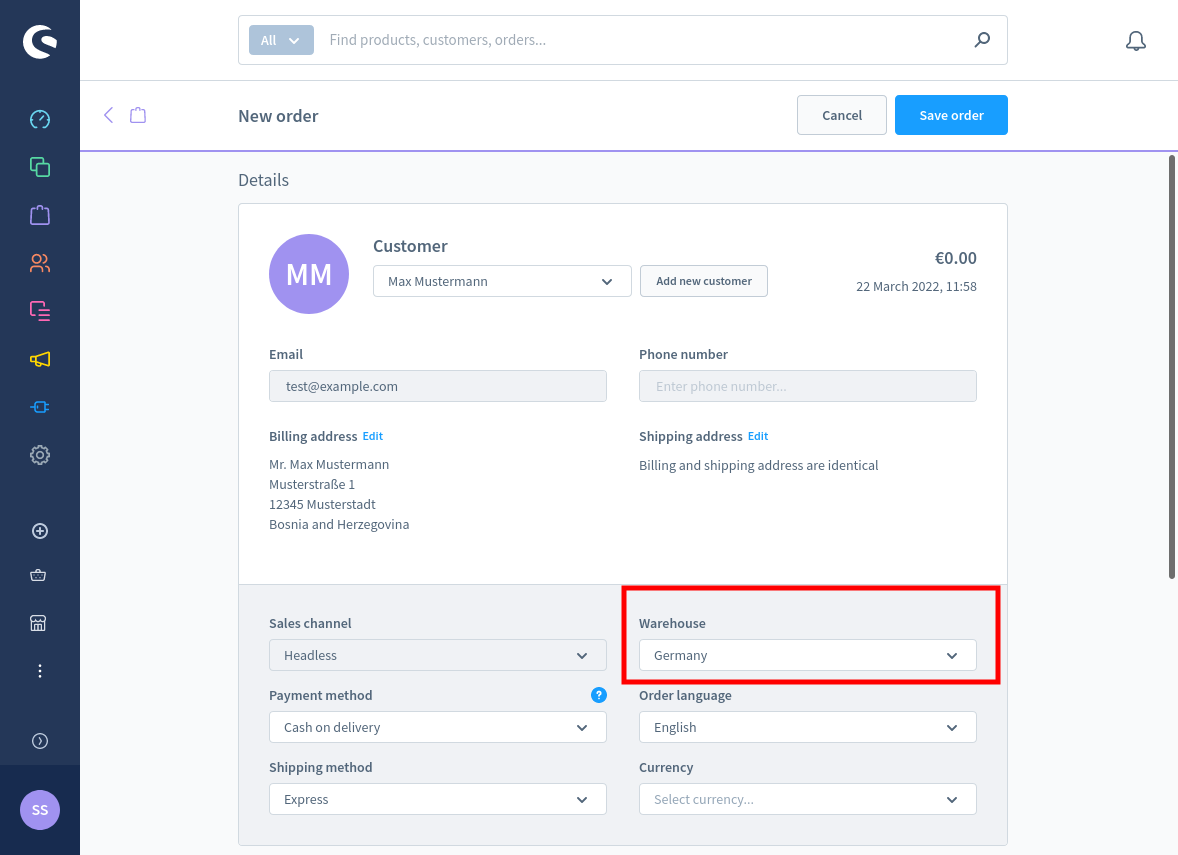
A warehouse must be selected in addition to the standard create order process. The Warehouse field is placed next to Sales Channel. Once, a warehouse is selected you can choose items from that warehouse.
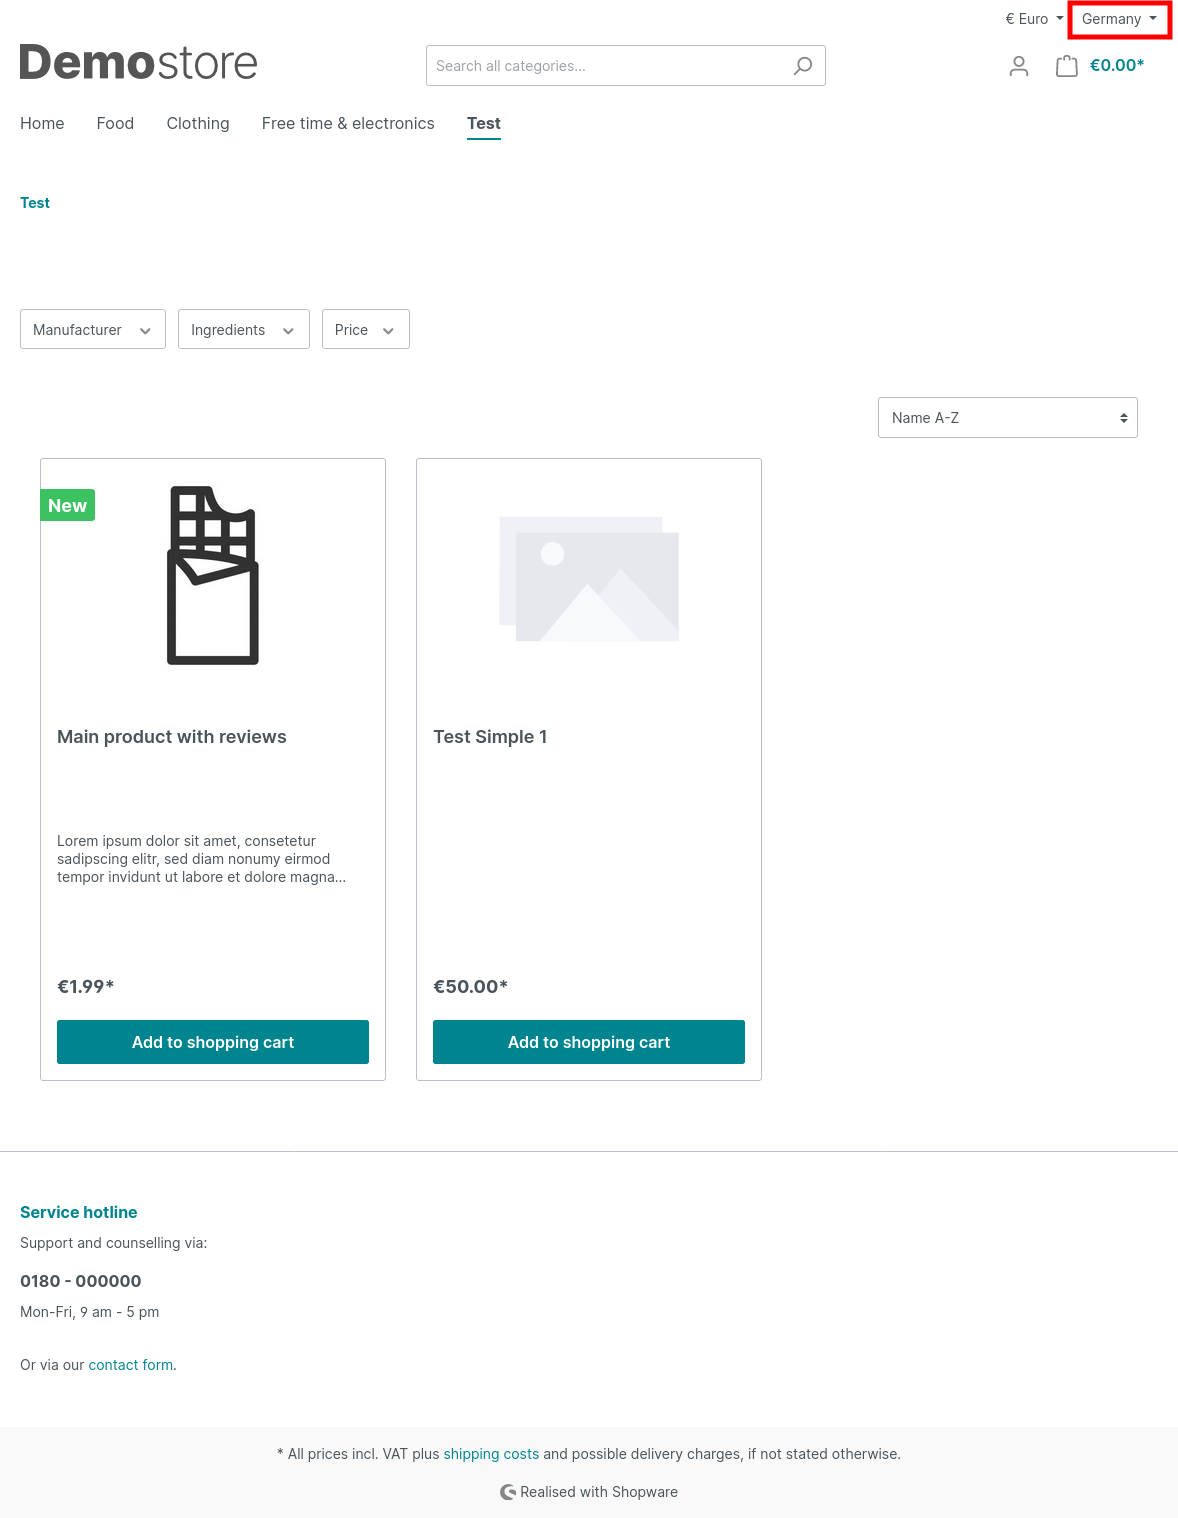
Customer Area
On the module installation, a customer can check products availability per warehouse and buy products from different warehouses.
A warehouse switcher is placed next to the currency selector.
Each order has assigned warehouse information reflected.
Comments